Color management in photography using a gray card
-

-
16.10.2023
-
Article
In commercial photography and especially in product photography, it is necessary to ensure that the color tones of the images correspond to the original color throughout the entire production process. The easiest way is to adjust the colors (ie white balance) of each shooting session using a gray card.
What is a gray card?
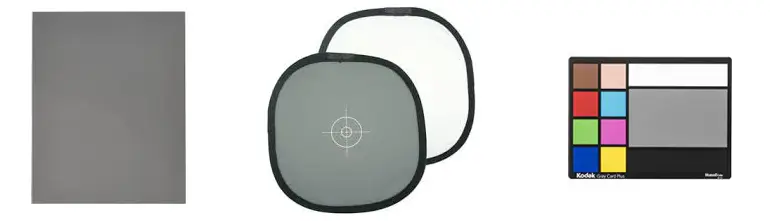
A gray card is a flat object with exactly 18% black tone, often a cardboard card.
You can buy gray cards from photography shops and they are on average very affordable.
18% black (i.e. gray) sounds strange, but it reflects light back exactly between white and black. And with this exactly "half-way" reflection, we are able to ensure a perfectly correct white balance in the camera or image processing!
White balance and colors
We know that colors reflect differently in different lighting. Our eyes adapt to this automatically, but in cameras, the adaptation takes place by adjusting the white balance.
So we can always reproduce the original and correct colors in photographs (in sunlight or fluorescent lighting or flash lighting, etc.), as long as we adjust the white balance settings to suit the light of the shooting situation. And it's actually very easy!
How to use the gray card?
The idea is to first complete the desired set and lighting. Then you place the gray card in place of or in front of the subject of the future photograph and take one picture.
Every time the lighting of the object changes, the gray card must be photographed again.
You can adjust the white balance either in the camera or leave the adjustments to image processing. It is recommended to take pictures in RAW format to save a wider tonal range.
Adjusting the white balance in the camera
Usually you select the white balance adjustment in the camera settings, take the gray card image you just took as a reference and set the custom white balance based on this image. The procedure varies slightly for different camera brands and models, but you can find detailed instructions for custom white balance adjustment online or in your camera's manual.
Adjusting the white balance in image processing
If you outsource the image processing, include your gray card image with the material to be worked on.
If you process your images yourself, e.g. in Photoshop and Lightroom programs, when opening RAW images, there is automatically an option to adjust the white balance. Open all images in the same set at once to apply the adjustment to all images.
In Photoshop, you can also adjust the white balance of e.g. JPG, PSD and TIF images by selecting Filter -> Camera Raw Filter from the menu. However, it is preferable to shoot RAW images!
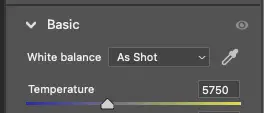
Select the pipette ![]() and click on the gray card in the picture with it. Activate the adjusted white balance by accepting it for all images in the set. White balance adjusted 😊
and click on the gray card in the picture with it. Activate the adjusted white balance by accepting it for all images in the set. White balance adjusted 😊