Ghost mannequin photography tips
-

-
10.10.2019
-
Tips
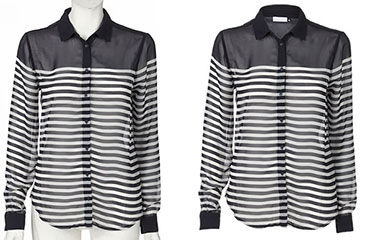
The right product photo can be the difference between a product that does OK in your web store or your best seller. For clothing especially, the photo is everything. That is where the ghost mannequin, often called the invisible or 3D mannequin, comes in. The idea is to show the clothes as they look when worn, but you don’t see the model or mannequin in the shot.
It’s the best of both worlds, the natural shape of clothes being worn, but without the distraction of a mannequin or model. If you are a professional photographer or run a clothing store of any kind, you can test this out yourself, with three free ghost mannequin images simply by clicking here to register.
To get the best out of ghost mannequins, here are some tips to ensure your clothing photos are as good as they can be:
1. Choosing the right mannequin (or living model)
When choosing a mannequin, matt white is best as it eliminates stray reflections. Just as important, and this also applies to living models, find a shape and size that suits the clothing you have. The clothes should hang naturally and fit well onto the mannequin without stretching or being too loose.
If you are using a more traditional mannequin or a living model, remember that you also need to shoot the inside of the garment too, so that the full ghost look can be created in editing.
2. Dressing and styling
Even with careful choice of mannequin or model, not every piece of clothing will hang perfectly on it. Use pins and tape to get the natural look you want, while keeping everything level and in symmetry. You can use the grid tool in photo editors on your test shots to check hems, shoulders and so on are level.
3. Choosing the right shooting angle
For tops, make the chest the focus, ensuring the image is wide enough to capture the full length of the piece. When shooting pants, the hip area should be the focal point. Head on images look great, but don’t forget to take shots from the back of the garment, too.
4. Lighting
Use cooler lighting for clothing photos, as this allows for maximum contrast, displaying the colours more naturally and highlighting the contours of the clothing more clearly. Whatever lighting you have, ensure that it is consistent through the shoot for every angle, front, back and inside, so that the editing works.
5. Shooting equipment
All you’ll need is a mannequin or a living model, lights, tripod, camera and the clothes you want to shoot. A tripod is essential for studio shots, it makes sure that the positioning of the garment remains consistent across shots to achieve the depth of field you need. Not only that, it removes any possibility of shake, giving you pin sharp photos every time, even on longer exposures. A plain background makes editing the shots much easier.
6. Image editing
Creating the perfect ghost mannequin image can be time consuming. The elements need to be separated from the background (clipped), then dust retouched and placed on the right layers for combining. Next, the hem and/or sleeves might need some wrapping, and finally the natural looking shadow needs to be built between the front and back elements.
At Maskmill, we provide a fast, professional service that takes care of the entire editing process for you while delivering quality results that make your clothing shots look fantastic.
As a professional, you can test Maskmill’s high-quality service with 3 FREE ghost mannequin images. Simply register now and claim your images to get started with ghost mannequin photos right away!